If you’ve ever walked into a processing plant at 2 a.m. for an emergency shutdown, only to find a critical Fisher butterfly valve stuck half-open, you know how stressful a “not closing properly” issue can be. I’ve spent the last 12 years working as a Fisher butterfly valve supplier, which means I’ve answered hundreds of these kinds of calls, ranging from paper mills complaining about inconsistent pulp flow to oil and gas refineries dealing with hazardous material leaks. More often than not, troubleshooting these valves isn’t about pulling out a fancy proprietary tool—it’s about methodically checking the most common, fixable issues before diving into more complex internal parts. Today, I’m walking you through a step-by-step troubleshooting process I teach all our clients, rooted in real on-site fixes I’ve applied myself. Fisher Butterfly Valve

First, let’s start with the basics: confirm the problem and rule out external factors before touching the valve itself. I once had a call from a sugar refinery last year that thought their 8-inch Fisher butterfly valve was broken, only to realize the plant’s programmable logic controller (PLC) had been reset the night before, so the signal was stuck at 30% instead of the full “close” command. That’s why the first step should always be verifying the input and control system—external issues are the culprits in about 30% of the cases I’ve seen. Grab your voltmeter (or use the portable signal tester we keep in every service kit for clients) and check the signal to the actuator. Fisher butterfly valves most commonly use a 4-20 mA signal for modulating control, so if you see a reading below 3.8 mA, that means the command isn’t actually a “close” signal, even if the DCS screen says it is. Also, double-check air supply to the pneumatic actuator—Fisher’s standard GX or Series 67 actuator needs a steady 80-100 psi of clean, dry instrument air. I’ve seen plants use compressed shop air with moisture, which can corrode the actuator’s air filter or clog the solenoid, leading to slow or incomplete valve movement. If the air gauge is fluctuating or below 75 psi, bleed the filter (most Fisher valves have a standardized quick-drain filter) and adjust the regulator before moving on.
If the control system and air supply check out, the next step is to inspect the valve’s end connections and pipe alignment. This is another simple, easy-to-miss issue that causes persistent closing problems. A Fisher butterfly valve uses a thin, lightweight disc that sits between two flanges in the pipe. If the pipe is misaligned—say, one flange is 1/8-inch offset from the other—the disc can’t seat fully, because it’s being pulled off-center as the valve closes. Last quarter, a chemical plant called us because their 10-inch Fisher butterfly valve wouldn’t seal, and after checking, we found the pipe had shifted during a recent piping expansion. We had to loosen the flange bolts, realign the pipe using a laser aligner, and retorque the bolts to Fisher’s recommended 25 ft-lbs (for 10-inch flanges, per API 609 standards) to fix it. To check for alignment, use a straight edge or a dial indicator: place the indicator on the valve’s body, rotate the valve by hand, and watch for side-to-side movement of the disc. If there’s more than 0.05 inches of play between the disc and the pipe wall, alignment is likely the problem. Also, check for debris in the pipe line—small pieces of scale, weld slag, or even old gasket material can get wedged between the disc and the seat, blocking it from closing all the way. A quick visual check through the valve’s inspection port (all Fisher butterfly valves have a 1-inch inspection port on the body) can often spot this. If you see debris, turn the valve 180 degrees to dislodge it, then cycle it manually a few times before putting it back into automatic control.
Once external checks are clear, it’s time to look at the actuator and its linkages, since they’re the parts that translate the control signal into physical valve movement. Fisher’s pneumatic actuators are built for long life, but over time, linkage pins can wear out, or the torque limiter (a key safety feature on most modulating valves) can be misadjusted. Let’s start with linkage inspection: locate the arm that connects the actuator shaft to the valve’s disc shaft. Check for loose bolts, bent arms, or pins that are corroded or missing. Last spring, a grain processing facility had a Fisher butterfly valve that only closed 70% of the way, and we found the linkage pin had snapped from years of being exposed to humid grain dust—there was no way the actuator could transfer full torque to the disc. Replacing the pin (we keep Fisher OEM linkage pins in stock for all common sizes) fixed that issue in 15 minutes. Next, check the torque setting. Fisher specifies that butterfly valves need a set amount of torque to close fully and seat properly, based on pipe size and process pressure. If the torque limiter on the actuator is set too low, it will stop the disc before it can seat against the rubber or metal seat. To adjust it, refer to the actuator’s manual—for a Series 67 actuator, you’ll turn the torque adjustment screw clockwise to increase torque until the valve cycles fully, then back it off 10 degrees to avoid over-torquing the seat. I always remind clients not to crank the torque too high, though—over-torque can crack the disc or wear out the seat prematurely, which leads to leaks down the line.
If the actuator and linkages check out, the issue is likely with the valve’s seat or disc, the parts that actually create a seal when the valve is closed. Fisher offers two main seat types for butterfly valves: resilient seats (made of EPDM, Buna-N, or Viton) for low-pressure applications, and metal seats for high-temperature or corrosive services. Resilient seats wear faster because they’re soft, and common issues include seat deformation, scoring, or debris trapped between the seat and disc. To inspect the seat, you’ll need to remove the valve from the pipe or at least pull the disc out of the body (for most wafer-style Fisher butterfly valves, this is a quick process—just remove the top and bottom flange bolts, and slide the disc out). If you see small scores or nicks on a resilient seat, you can smooth them with 400-grit sandpaper, but if the seat is cracked or permanently deformed (which often happens if the valve is left closed for long periods in high temperatures), it needs replacement. I keep a spare set of EPDM seats for 4- to 12-inch Fisher valves in my truck at all times, because I’ve had so many on-site calls where a simple seat swap fixes the problem in an hour. For metal-seated valves, the issues are different: metal seats can gall (fuse together) if the valve is cycled without lubrication, or the disc’s edge can wear down over time, leading to a poor seal. Metal-seated valves need to be lubricated annually with Fisher-approved anti-seize compound, and if the disc is worn, it can be machined lightly (or replaced) to restore its sealing edge. I once worked with a power plant that had a 16-inch metal-seated Fisher butterfly valve that wouldn’t close, and we found the disc’s leading edge had worn 0.03 inches—machining it to factory specs brought the seat back to full sealing performance.
One less common but still frequent issue I’ve encountered is air in the actuator’s diaphragm, which can cause inconsistent or partial movement. Fisher’s pneumatic actuators use a flexible rubber diaphragm to create force; if there’s a tear in the diaphragm, or if moisture has built up inside, the actuator won’t generate enough force to close the valve fully. To check this, disconnect the air supply from the actuator, open the vent port, and apply a manual air signal (using a hand pump) to the actuator. If the disc doesn’t move through its full range, or if you hear hissing from the vent port, the diaphragm is likely damaged. Replacing a diaphragm is straightforward—Fisher provides a detailed step-by-step guide for every actuator model, and we keep OEM diaphragms in stock for all common sizes. I always recommend clients replace the diaphragm every 5 years as preventive maintenance, even if it doesn’t show visible damage, because a failed diaphragm will often catch you off guard during a critical process run.
After you’ve completed all these troubleshooting steps, it’s important to test the valve thoroughly to confirm the fix. Cycle the valve manually first, making sure it opens and closes all the way without sticking, then switch back to automatic control and monitor the DCS for 15-20 minutes to ensure it holds position. If you still have issues after going through this process, don’t hesitate to reach out—there are more complex issues, like internal gear wear (for gear-operated valves) or control signal interference, that may require specialized support.
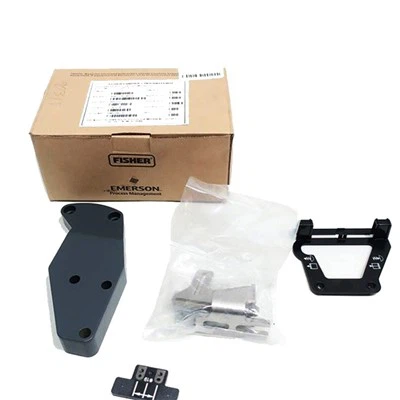
As a Fisher butterfly valve supplier, my job isn’t just to sell valves—it’s to help clients keep their processes running smoothly, which is why I’ve refined this troubleshooting process over thousands of on-site visits. The key takeaway here is to start with the simplest, most common issues first, don’t skip external checks, and always use Fisher OEM parts for replacements (aftermarket parts often don’t meet the exact tolerances Fisher designs for, leading to repeat issues). If you’re dealing with a Fisher butterfly valve that’s not closing properly, or if you need spare parts, preventive maintenance support, or help selecting the right valve for your application, don’t hesitate to connect with our team to discuss your needs.
Fisher Valve Parts References
Fisher Controls International. (2020). Fisher Butterfly Valve Installation, Operation, and Maintenance Manual (Publication Number: 2020-001). Emerson Process Management.
American Petroleum Institute. (2019). Specification for Butterfly Valves (API 609, 7th ed.). API Publishing Services.
Miller, T. (2022). Common Failure Modes and Troubleshooting of Pneumatic Actuators for Industrial Valves. Journal of Industrial Maintenance, 18(3), 45-52.
Century Weiye (Dalian) Control Equipment Co., Ltd.
Address: 2205, Building 8, Red Star International, Ganjingzi District, Dalian City, Liaoning Province
E-mail: serena@valvesjwy.com
WebSite: https://www.valve-sjwy.com/
