If you’re reading this, chances are you’ve just upgraded your Audi’s brake discs—maybe you swapped out worn factory ones for high-performance Audi Series brake discs from our supplier line, or you’re preparing to install new rotors for a track day, daily drive reliability, or just that smooth, consistent stopping feel only quality brake components deliver. Whatever the case, one thing most first-time (and even some experienced) vehicle owners miss is that new brake discs aren’t ready to perform at their peak the second you bolt them on. That process, called “bedding” or “burnishing” your brake system, isn’t just a vague automotive myth—it’s a science-backed step that prevents uneven wear, noise, premature failure, and even safety hazards down the line. As a supplier of Audi Series brake discs, we’ve helped hundreds of drivers get this step right, and today I’m breaking down exactly how to bed your new rotors properly, why it matters, and what happens if you skip it. AUDI Series Brake Discs
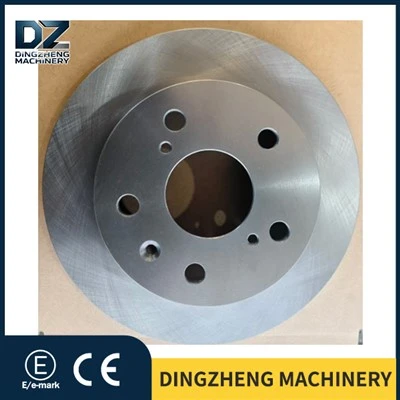
First, let’s get clear on what bedding actually does. When a brake disc is manufactured, it goes through a grinding or casting process that leaves tiny, uneven micro-topography on its surface. Think of it like a brand new wooden table: it has rough, raised grain and small imperfections that need smoothing out before you put a finish on it. Brake pads, too, have a similar uneven surface from production. When you first clamp these two together at high speeds or heavy stops, those high spots create friction hotspots. Those hotspots can warp the rotor’s surface, cause the pad material to glaze over (a hard, shiny layer that makes braking slippery), or lead to uneven pad wear that leaves you feeling a vibration in the steering wheel when you brake—one of the most common complaints we get from Audi owners who installed new discs and skipped bedding. For Audi specifically, this is extra important because the brand’s precision-tuned braking systems are calibrated to work with perfectly flat, evenly worn rotors. A poorly bedded disc can throw off that calibration, leading to inconsistent pedal feel over time.
Now, before we dive into the step-by-step process, let’s cover a few non-negotiables that apply specifically to Audi Series brake discs. First, make sure your new discs are compatible with your Audi model—our supplier team always emphasizes this because wrong-sized or mismatched rotors will never bed properly, no matter how careful you are. Whether you drive an A4, Q5, R8, or any other Audi in our series, the bedding process remains consistent, but you’ll want to note that performance rotors (like drilled or slotted options) may have a slightly different timeline, but the core steps stay the same. Also, check that your new brake pads are matched to your new discs; even the best Audi Series brake discs won’t perform if paired with low-quality pads, so we always recommend pairing our products with OE-equivalent or high-performance pads for optimal results.
With that out of the way, let’s walk through the actual bedding process. We’ve tested this step-by-step method on everything from daily-driven A3s to track-focused RS7s, and it’s the most reliable way to get a uniform transfer layer (the smooth, even layer of pad material that forms on the rotor surface) without overheating or damaging components.
First, prep your space and your Audi. You’ll want a quiet, flat stretch of road—empty highway on-ramps, a back country road with minimal traffic, or even a closed private road if you have access. Avoid busy streets or areas with stop-and-go traffic; you need long, uninterrupted stretches to build consistent speed. Before you start, make sure your brake fluid is at the correct level, your tires are properly inflated, and you’re in good physical condition to drive. Most importantly, make sure your brakes are cold—we mean completely cold, meaning you haven’t driven them at all in the past 4-6 hours. Bedding on hot rotors will cause uneven transfer layers, so if you just drove to a parking lot to start this process, wait a bit for everything to cool down.
Step 1: The initial warm-up. This is where you get your brakes up to operating temperature without pushing them hard. Start driving at a steady 50 to 55 miles per hour (about 80 to 90 kilometers per hour—we use both for international Audi drivers, since our supply goes globally). Once you’re at that speed, apply firm, consistent pressure to the brake pedal until you slow down to about 10 miles per hour. Don’t come to a full stop—hold the pedal at that light pressure for a second before accelerating back up. Do this 10 times in a row, each time maintaining that 50-55 mph to 10 mph range. The goal here is to warm both the rotors and pads evenly, so don’t brake so hard that you smoke the tires or heat the system past 200 degrees Fahrenheit (about 93 degrees Celsius). You can use a brake temp gun if you want to be precise—for this step, aim for 150-200 degrees F.
Step 2: The heavy bedding stops. Now that your system is warm, it’s time to lay down that transfer layer. This is the most critical part, and it requires controlled, consistent stops. Return to that same 50-55 mph speed, and this time apply medium pressure to the brake pedal to slow down to 5 mph. Again, don’t come to a full, hard stop—you want to gradually reduce speed over about 8-10 seconds each time. Do this 15 times, making sure each stop is uniform in pressure and speed reduction. For Audi drivers, especially those with quattro all-wheel drive, make sure you’re braking evenly across all four wheels; if one corner seems to slow the car more than the others, check for brake caliper alignment later, but during bedding, just focus on consistent pedal pressure. A few notes here: don’t do these stops back-to-back without giving a tiny bit of cool-down time between each. After every 5 stops, drive for 10 seconds at a steady 30 mph without braking—this lets the rotors and pads cool slightly, preventing excessive heat buildup. The goal here is to get your brake system to 300-350 degrees F (about 149-177 degrees C); if you start to smell burning pad material, you’ve gone too hot, so back off and let everything cool for a minute before continuing.
Step 3: The final cure. Once you’ve completed the 15 heavy stops, you’re almost done, but you need to let the system set the transfer layer without disturbing it. Drive at a steady 30 mph for about 5 minutes, no braking at all. This lets the fresh layer of pad material bond evenly to the rotor surface, rather than rubbing off from immediate hard stops. After that, you’re ready to drive normally—but wait, hold on for the first 100 miles. During those first 100 miles, avoid hard braking, towing heavy loads, or track day runs. The transfer layer is still fragile at this point, so aggressive stops can wear it unevenly. Once you hit 100 miles, you can push the brakes as hard as you want, whether that’s daily commuting, mountain driving, or track use.
Now, let’s talk about common mistakes that lead to a bad bedding job, especially for Audi Series brake discs. The biggest one we see is rushing the process. Some drivers think 5 stops instead of 15 will work, but that’s why they end up with a vibration when braking or squealing. Another mistake is doing the bedding on wet roads—water cools the brakes too quickly, which makes the transfer layer uneven. If it’s raining, wait for a dry day; we even recommend waiting until your rotors are completely dry from any moisture on the road, because even a little water can disrupt the bonding. For performance Audi owners, another common error is using the parking brake during bedding—modern Audi parking brakes are integrated into the rear discs, so using them during bedding can cause uneven wear on the rear rotors. And finally, don’t clean your new discs with brake cleaner before installation? Wait, no—actually, do clean them, just not right before bedding. Wait until after bedding to clean any remaining surface debris, because cleaning right before can leave a residue that messes up the transfer layer.
You might be wondering: what if my new Audi Series brake discs came pre-bedded? Some manufacturers offer pre-bedded rotors, but even then, we always recommend a quick, light bedding process for Audi systems. Pre-bedding works for initial installation, but your brakes will still benefit from that final transfer layer to match your specific pads and driving style. It’s a small extra step that makes a huge difference in long-term performance.
Now, why does this matter for you as an Audi driver specifically? Audi’s engineering team designs its braking systems with a specific coefficient of friction in mind for both factory and aftermarket components. A properly bedded disc will match that coefficient perfectly, giving you a firm, consistent pedal feel, shorter stopping distances, and less noise. We’ve had customers who skipped bedding call us a month later complaining of a brake squeal, and when we check, it’s almost always a glaze on the rotor surface that a quick re-bedding process fixes. Even better, a well-bedded disc lasts longer—uneven wear can cut rotor life by 20-30%, which is a big deal when you’re investing in high-quality Audi Series brake discs.
If you’ve already installed your new discs and skipped bedding, don’t panic. You can re-brake your brakes at any time, as long as the rotors aren’t warped or damaged. Just follow the same steps we outlined, and you should be good to go. If you’re unsure, reach out to our team for guidance.
At the end of the day, bedding new brake discs isn’t a complicated process, but it’s a crucial one. Whether you’re a daily driver looking to keep your Audi stopping safely, a performance enthusiast gearing up for a track day, or someone just tired of that annoying brake squeal after an installation, taking the time to bed your new Audi Series brake discs correctly will save you time, money, and hassle down the line. We’re proud to supply Audi Series brake discs to drivers around the world, and we always make sure to include this bedding guide with every order, because we know how important it is for our customers to get the most out of their components.
If you have questions about your specific Audi model, need help confirming compatibility, or want to discuss bulk orders for your shop or fleet, feel free to reach out to our team to start a conversation about your brake component needs. We’re here to help you keep your Audi stopping smoothly, safely, and reliably for miles to come.
VOLKSWAGEN Series Brake Discs References
- Society of Automotive Engineers (SAE) International. “Brake Rotor Burnishing: A Methodology for Optimal Pad-Rotor Transfer Layer Formation.” SAE Technical Paper Series, 2019.
- Audi AG. “Audi Brake System Service Guidelines: Rotor and Pad Installation.” Audi Technical Training Manual, 2021.
- Automotive Brake and Friction Manufacturers Association (ABFMA). “Best Practices for Brake Component Bedding and Break-In.” ABFMA Industry Guide, 2020.
Laizhou Dingzheng Machinery Co., Ltd.
As one of the most professional audi series brake discs manufacturers and suppliers in China, we’re featured by quality products and good price. Please rest assured to buy cheap audi series brake discs for sale here from our factory. We also accept customized orders.
Address: Luan Jia village, Tushan town, Laizhou city, Shangdong
E-mail: AMY@cndingzheng.com
WebSite: https://www.dingzhengbrake.com/
